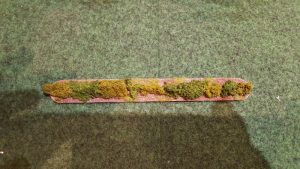
I haven’t made any small scale scenery for a while. Far longer than I remembered. I made a load of hedges for mt 6mm games way way back in 2011! http://blog.belisarius.org.uk/2011/06/boosting-hedge-fund.html. These used kitchen scouring pads and although they worked well they looked a little ‘formal’ – more like tidy well maintained hedges rather than ‘wild’ country ones!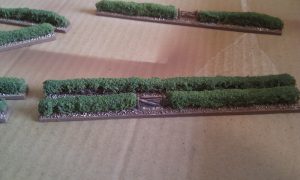 So I wanted something a little rougher looking. I’ve seen various techniques online so adopted a variation on those for these. I’ve always used Woodland Scenics clump foliage on my bases but found the colours (especially the dark green) to be a little too uniform. So a trip last week to Midlam Miniatures in Felling saw me leave with two packs of Javis clump foliage. This seemed to have a better colour with a bit of variation and highlight to it. So I started off with a sample length of hedge using a large ‘lollipop’ stick. In the past I’ve just used PVA to fix clumps down, putting PVA in a tub and dipping the clumps in and then sticking them down. However the Javis clumps were a nightmare! Very crumbly and bits sticking to the PVA and disintegrating as I picked them up! And the ‘foam’ material seemed to compress and stay compressed as you squeezed it to get a good ‘stick’. Total nightmare! I was not impressed. And the PVA seemed reluctant to stick it to the stick so I ended up using a hot glue gun. Once it was all dry I lathered the lot in watered down PVA and the end result looked OK even if a little squished in places.
I was almost going to give up on the stuff as far too faffy to use but having paid £2 a bag I didn’t want to waste it. So… deciding that 12 strips was a good number to have I lined up another 11 of the sticks. I coated one side with PVA to seal it then when dry coated the other side and dipped it in my usual ballast/sand type mix. Rather than waste time painting by hand I stuck the stick to a board and retired to the back yard with a can of Army Painter Leather Brown spray.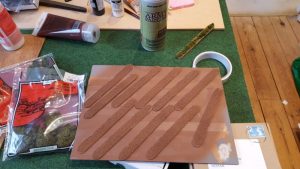 Although this is a little lighter than the Burnt Umber I use for my bases once I dry brush with my usual two highlight colours it is close enough.
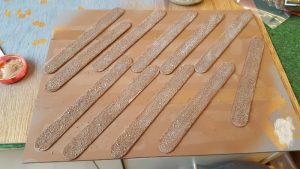 I wasn’t keen on using the hot glue gun for all of this (and visible residue is shiny) so I just ran a line if UHU glue along the stick and having spent a little time preparing clumps in the two colours I started filling up each stick.
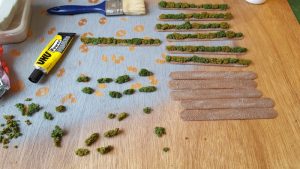
Once stuck I then carefully socked all the clumps in watered PVA. I gave them a proper soaking and left to dry overnight. This stiffened and sealed the clumps.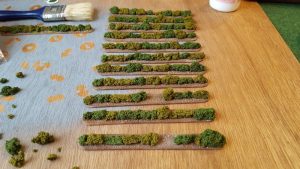 And then to blend them in a little with all my basing a dabbed a few bits of PVA along each side of the hedge and added some of my usual static grass mix.
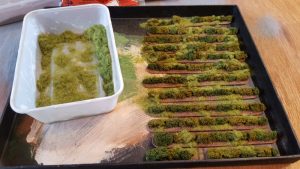 And that was them done! I left gaps in a couple of hedges to allow access through.
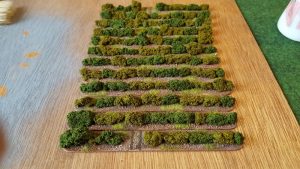
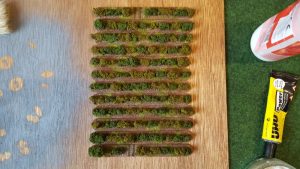
Quite pleased with the result and the final method made the use of the Javis clumps more tolerable. Given that you can never have too many hedges (and assuming I have enough sticks!) I will make up another dozen lengths and do a few half length ones to allow a bit more flexibility in laying them out. I’ll need to buy more foliage first though! I’d hoped to set up a small table for a game this weekend but time didn’t allow. The hedges look like they will work fine for 6mm and 10mm and even for for 15mm at a push so well worth the effort!
While making up the sample hedge I also made up a couple of 6mm pylons I have had sat gathering dust since I primed the inner surfaces more than several years ago! Can’ remember who made them but they look fine and although a little fiddly to stick together (UHU worked again!) are worth the effort. I have another 8 to do…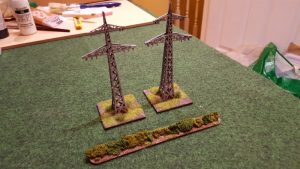 So a productive few sessions. Not quite as exciting as going to Salute but a damn sight cheaper!
A

Very splendid, Andy. You’ve inspired me to try my hand at making clumps for my own hedges.